h1

2nd Racking

November 24, 2008

This is how much sediment had collected at the bottom of the carboy in the almost 4 weeks:

picture-001

Another view:

picture-002

picture-008

The wine was actually beautifully clear as you can see here:

picture-011

And here: (the glass is just foggy). Unfortunately it tasted disgusting. I have no idea if this is normal for a wine that’s only about a month old, but as of yet it’s not good, and still a little carbonated. I read some home winemaking blogs online and all of theirΒ picture-012comments definitely made me feel better. The consensus for people in our situation is that it really just has to age. Oh! And FYI I took a hydrometer reading and it was 1.090.

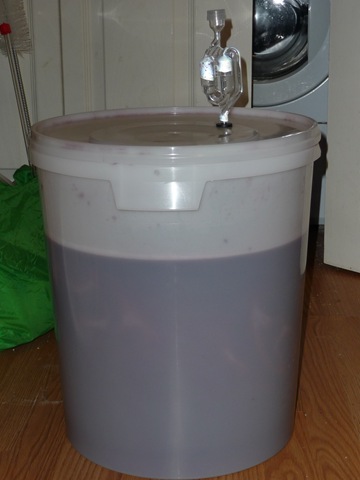
And the pumpkin wine. We reached a 1.030 reading so it was ready for the carboys. It fit fairly neatly (with only a little leftover) into 2 carboys. I think they’re both going to end up being about 1/3 sediment so I think it will end up at 2nd racking fitting into 1 carboy. We tasted it and it’s really good!

picture-004


h1

It’s Working So Far

November 21, 2008

Remember I added the yeast nutrient a couple of days ago? Well I took a hydrometer reading and it started fermenting again! I’m super excited. It’s now down to 1.030 so we’ll rack everything on Saturday including the blackberry wine.Β 

I’m still not sure if the pumpkin wine will turn out, but at least it’s not over yet!

Get ready for a pictures post on Monday πŸ™‚

h1

Stuck Fermentation

November 19, 2008

As I said before the pumpkin wine was an experiment. Well the fermentation was stuck. I knew this because it stopped bubbling and the hydrometer reading wasn’t going down (meaning the yeast stopped eating the sugar). I looked up some advice online. I found one that said to add yeast nutrient. So I did. Then another website said “although tempting do NOT add yeast nutrient”. It was way too late for that advice. It did start bubbling right away, but who knows if because of what I did if the wine will survive.Β 

I’m trying not to get too emotionally attached to it. After all it did only cost maybe $6 altogether. That was just for the pumpkin and the few cardamom seeds I used. The other ingredients I already had on hand from the blackberry wine. I’m just going to ride it out and go with it. What happens, happens.Β 

Speaking of blackberry wine I think it’s time to rack it a second time. The bubbling has slowed almost to a stop. There’s quite the collection of sediment on the bottom. Pictures tonight and another post tomorrow πŸ™‚

h1

Pumpkinwineohmygosh!

November 12, 2008

That’s how excited I am about this!

I know that it is fall and that it’s the perfect time of year to work with fresh pumpkins but I wanted to experiment with some small wine batches (1 gallon) with ingredients that we could have access to all year. That means canned pumpkin! Cheap and easy πŸ˜€

So easy: I just opened the cans of pumpkin, and added all of the ingredients as per the recipe and a special ingredient πŸ˜‰ = green cardamom…mmmmmm…..If you’ve never had the chance to taste and smell green cardamom get thee to an East Indian store post haste and buy some!

To prepare the cardamom I crushed it with a mortar and pestle then heated it on the stove in a frying pan to release the oils, then added it to the pumpkin mixture. This is an experiment and I don’t know if anyone has ever made canned pumpkin wine so my biggest concern is whether or not I will be able to clarify it.
Without further ado, the pictures:

Pumpkin with ingredients in primary fermentor

Pumpkin with ingredients in primary fermentor

Crushing the green cardamom

Crushing the green cardamom

Green cardamom heating on the stove

Green cardamom heating on the stove

Green Cardamom added to pumpkin mixture

Green Cardamom added to pumpkin mixture

I knew this time to take the hydrometer reading immediately - 1.100

I knew this time to take the hydrometer reading immediately - 1.100

Same hydrometer reading - different angle showing our potential alcohol content to be 13%

Same hydrometer reading - different angle showing our potential alcohol content to be 13%

Ultimately I envision this wine being a highly flavored highl alcohol content port-style wine. If I had planned better I could have gotten a more appropriate yeast, but again this is an experiment – so no pressure if it doesn’t turn out. Those of you who are in the know, know that true Portuguese “Port” is fortified with brandy. I think this will be happening for one of the gallons. Because as it is I think that there’s about 2 gallons in the primary fermentor.

h1

My First Video!

October 30, 2008

Does it work???

Sorry it’s sideways 😦

h1

Siphoning For Beginners or Reason #1,885,794 I Have The Best Husband

October 30, 2008

Our hydrometer reading finally reached 1.030 so it was ready to rack into the secondary fermentor where it will sit for about a month. Siphoning seemed impossible to me. I didn’t get it. We went onto youtube to see what we could find in the way of instructional videos. There was 1. We watched it. I still didn’t get it. So husband got to rack our wine! See pictures. Next time we do it I’ll make a video and post it.

Just starting - see no wine in the tube yet

Just starting - see no wine in the tube yet

Now the wine is starting to come down the tube...

It works!

Getting there. We didn't time it but I'd guess it took about 5 full minutes,

Now this is a total experiment. I took a short video so you can see how it bubbles constantly.

Working on this now so check back later πŸ™‚

h1

Blackberry Wine Making Part 2

October 23, 2008

Woops! We didn’t know we were supposed to take the hydrometer reading as soon as we had all of our ingredients mixed together – before the must started fermenting.
Remember I said earlier this week we didn’t know how to use the hydrometer? I had to go to the store yesterday to ask them. Got it.

Picture 001

Picture 003

I really love my hair color in this picture…..

Picture 007Β Β 

In the picture the reading says 1.070. When it reaches 1.030, then I transfer it into the secondary fermentor.

Since we didn’t take the reading in the beginning it’s not going to be at all accurate. The guy at the store said that whatever final reading I end up with to add “a couple of points”….So if I get 10% alcohol, that I can call it “about 12%”….Well now I know for next time!

h1

Wine & Cheese Catch-Up

October 21, 2008

Nath and I had a wine and cheese date about a month ago (?), but the pictures didn’t really turn out and we weren’t super excited about any of the cheeses so I haven’t been that motivated to post. I’m going to anyhow just so we don’t forget.

I do not know why some of the pictures are green, some are orange and some are super white πŸ™„

Picking out our glasses:
Picture 026

Our table all set (with the flash):
Picture 029 

And without the flash:
Picture 031

The names of the cheeses we ate:
wine & cheese

And pictures of the cheeses:
wine & cheese 2

And the wine:
Picture 036

Everything gets a “2” rating.

Again – sorry about the crap pictures. Better next time!

h1

Illustrated Blackberry Wine Making Part 1

October 21, 2008

If you read my other blog you know that hubby and I have 5 acres. It’s heavily treed so we don’t have very many blackberries, but neighboring vacant lands do so we decided it was a good time to learn home wine making!

The wine making kit came with equipment to make 6 gallons of wine. In order to do this we were going to have to pick 24 pounds of blackberries. We were only able to pick 18 😦 But as it turns out after adding all of the ingredients we were only about a half a gallon short so I went to the store and bought 2 pounds of frozen blackberries – so not so bad… Below are the pictures of the first few steps in the process.

Picture 104

Here are the berries sitting in the primary fermentor

Picture 105

At this point I couldn’t imagine how it was ever going to be enough berries.

Picture 106

The blackberries had to be squeezed, pressed, and strained through mesh bags. The mesh bags stay in the primary fermentor for the first week as well.

Picture 107 

Messy!

 Picture 110

Here are all of the ingredients I added (only a teaspoon or two of each so these little bags will last a long time!)

And here it sits for the next 5 days or so. I forgot to add that I added the yeast after it had sat like this for 24 hours.

Picture 113

Stay tuned over the next week or so as we attempt to figure out how to use a hydrometer, and siphon the must into the secondary fermentor! Weeee!

h1

Hiccup

June 30, 2008

Just a few short weeks after starting this blog I decide I want to do some cleanses. Currently doing the candida cleanse. That means no wine and no cheese. But my other half is still drinking beer so I will take pictures and force him to give his opinion so at least there will be that.

Because…I don’t think anyone is interested in my daily adventures in quinoa and hemp…?